Aim
In this article we will have high level overview of Arduino, its parts, sensors and how we can use it with Internet of Things aka IoT sensors. I will take you step by step in creating your first simple Arduino project and reading data from IoT temperature sensor.
Introduction
Arduino is open source programmable circuit board which you can use for creating electronic hardware. This board contains a microcontroller which can be programmed to sense and control the electronic components.
Following image depicts one of the most popular Arduino boards “Arduino UNO” and its components on the board:
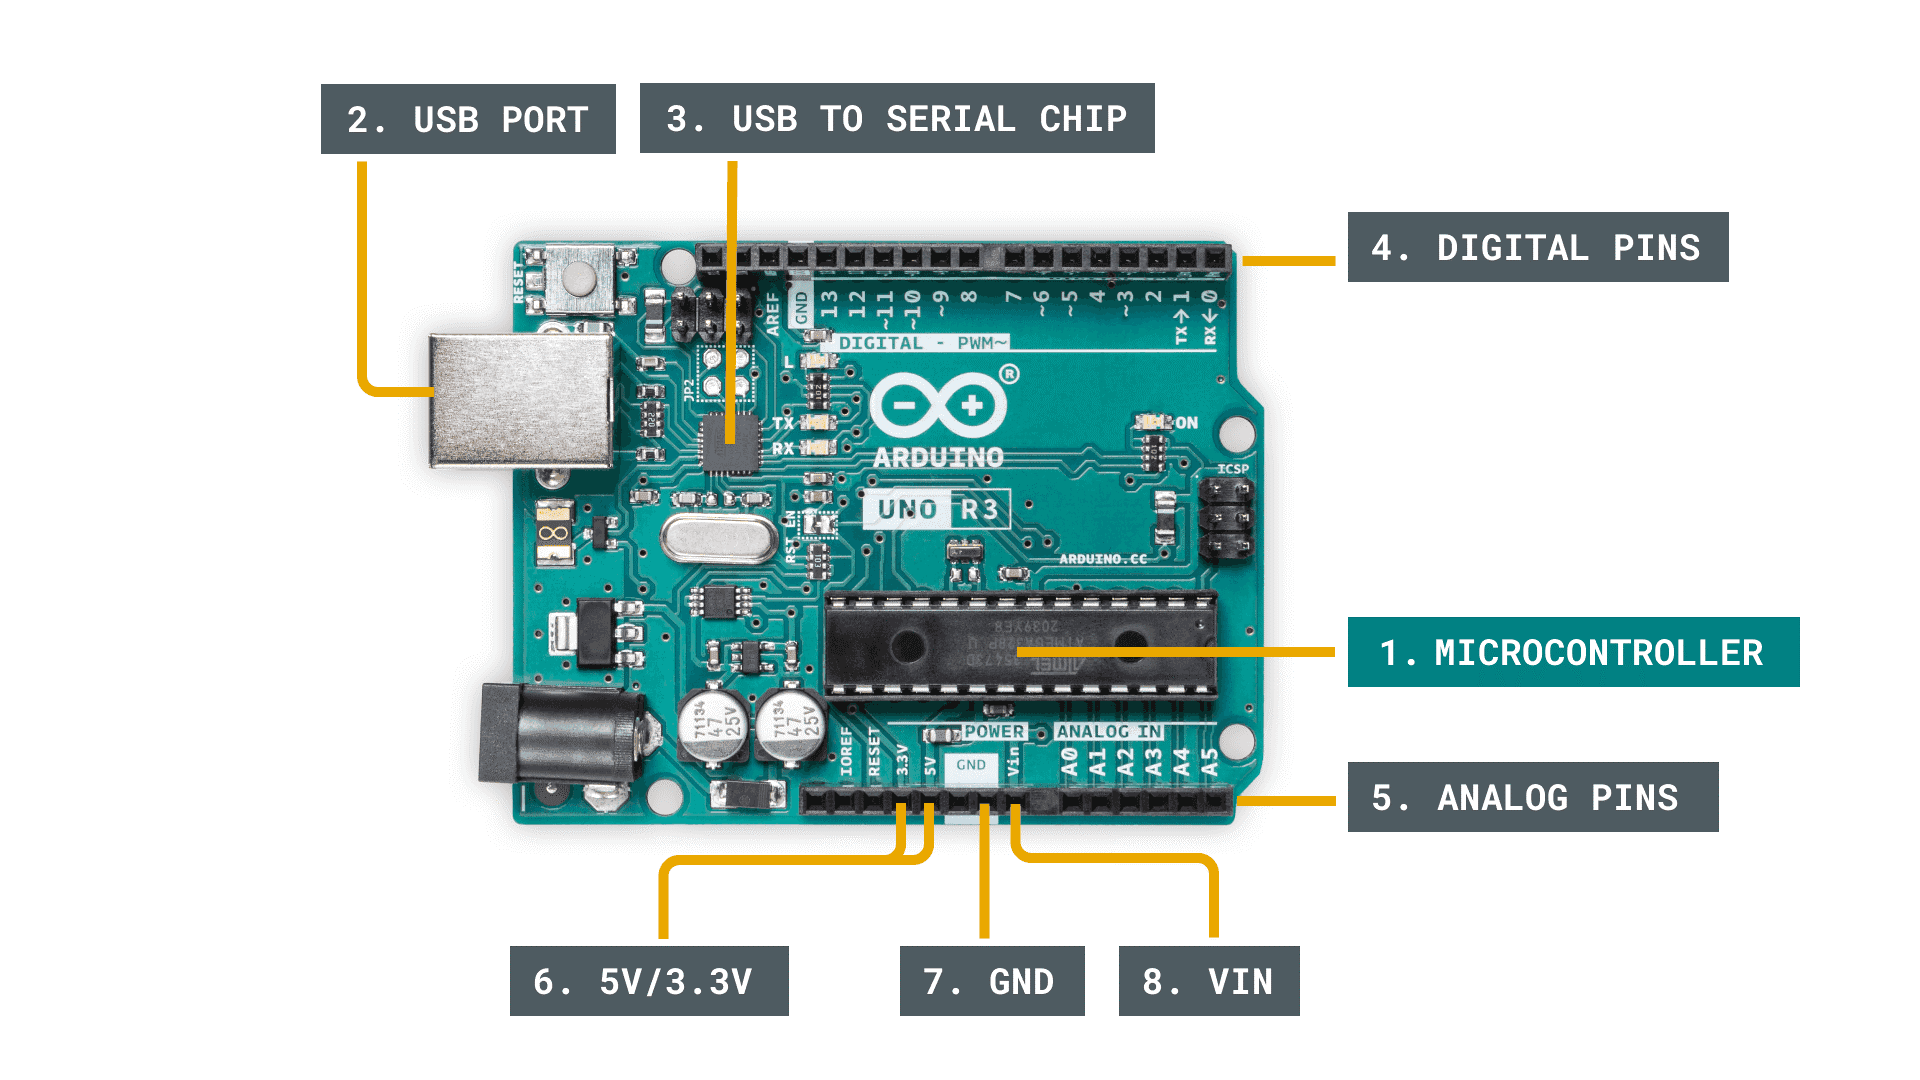
1. Microcontroller: This is the brain of the Arduino where the programs are stored, on UNO board the microcontroller is based on ATmega328P integrated circuit(IC).

2. USB Port: The USB port can be used to powering up the board and also to connect to PC and flash programs on the board
3. USB to Serial chip
4. Digital Pins: Pins 0-13 can be used for digital input or output
5. Analog Pins: These pins can read the signal from an analog sensor and convert it to digital

6. 5v, 3.3v out Pin: This pin supplies 5/3.3 volts of power to your electronic sensors and circuits
7. GND Pin: This pin is used to allow the flow of leakage and fault current. Sudden rise in flow current will damage the equipment, hence it is a protection.
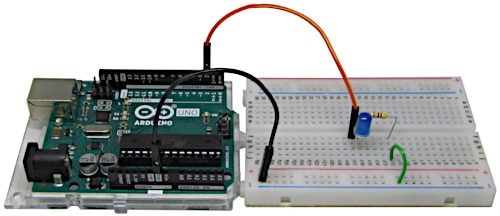
Breadboard: The breadboard allows you to create temporary prototypes and experiment with different circuit designs without permanently soldering the circuit together.
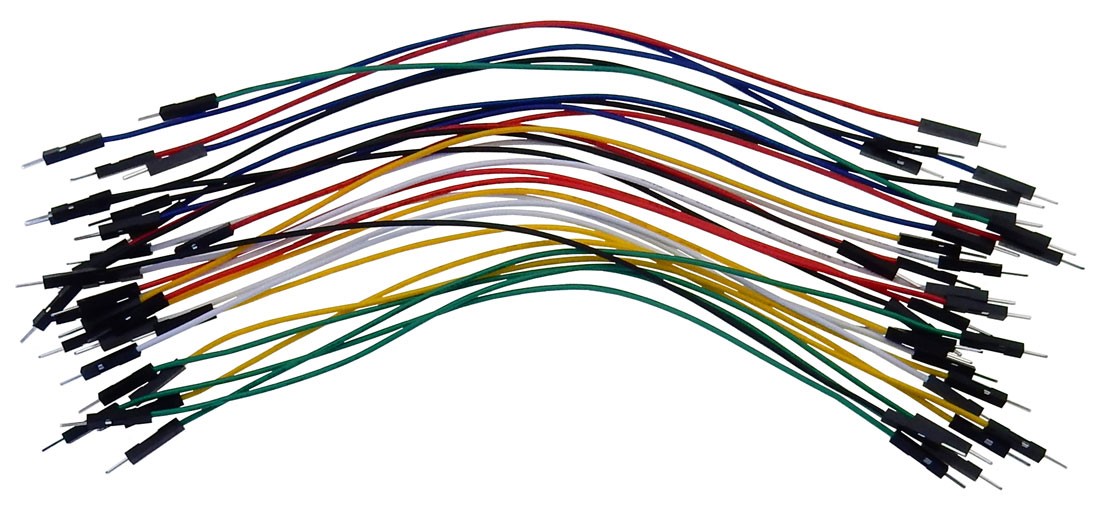
Jumper Wires: The electronic components are connected to each other using Jumper wires, electricity flows through these jumper cables, Jumper wires are of three types- Male to Male, Male to Female and Female to Female
LED: Light Emitting Diode, an LED can emit any color depending on its make, following LED emits blue light.

Resistor: Resistors resist the flow of electricity and the higher the value of the resistor, the more it resists, and the less electrical current will flow through it.

Your first Arduino Sketch
We can program the Arduino using C/C++ language, the programs in Arduino are called as Sketch, the sketches are saved as “.ino” extension. To write the programs we need to download the Arduino IDE which is available at https://www.arduino.cc/en/software
A minimal Arduino sketch consists of only two functions:
1. setup(): This function is called once when a sketch starts after power-up or reset. It is used to initialize variables, input and output pin modes, and other libraries needed in the sketch. It is analogous to the function main().
2. loop(): After setup() function exits (ends), the loop() function is executed repeatedly in the main program. It controls the board until the board is powered off or is reset. It is analogous to the function while(1).


Pin Connections
The above sketch turns the LED on and off each 1 second interval.
Sensors
A sensor, in simple terms, is used to sense its environment, meaning it records a physical parameter, for example temperature, and converts it into an electronic signal.

In this article we will use the temperature sensor.


LM35 is a classic Analog Temperature Sensor. LM35 has 3 pins: VCC, Data and GND.
Place the LM35 anywhere horizontally on your breadboard, the flat side of the sensor must be facing you. Then, connect three wires under the three pins of the sensor.
The wire on the left will go to the 5v pin on the Arduino.
The middle wire will go to A1 (analog pin 1).
The wire on the right will go to GND (-) on the Arduino.
Upload below sketch to Arduino.

You can see the program output in the Arduino serial monitor console

References
1. Temperature sensor Arduino project https://bit.ly/3SGSuJ8
2. Uploading Arduino sketch https://www.youtube.com/watch?v=wzc97nv8heU
3. Buy electronic components and sensors https://robu.in/
4. Arduino Wikipedia https://en.wikipedia.org/wiki/Arduino
5. Arduino IDE https://www.arduino.cc/en/software
6. Arduino starter kit https://amzn.to/3SEvASw
7. Make Electronics book pdf https://bit.ly/m4k3elekt